• Blog
  • Recipes
  • Supper Club
  • Parties
  • About
Menu

Fig + Berrie

Street Address
City, State, Zip
Phone Number
a gathering of recipes, party ideas, and pictures to inspire.

Your Custom Text Here

Fig + Berrie

  • Blog
  • Recipes
  • Supper Club
  • Parties
  • About

Garden Cake

December 6, 2018 Ally Wankier
Summer cake

I know it's been awhile since I've been on here but I'm trying to be better about that and share all the recipes I've been working on. This was another fun collaboration with Ella Newman and her wonderful photography skills, it was so much fun and this cake is just perfect for festive summer parties and celebrations. I think my favorite cooking of all is summer cooking, lots of things are growing begging to be used and its easy to make everything delicious. I love being able to carry a big feast out the back door and eat in the yard in the happy summer light where the sun doesn't leave till 9:00. I think this is the perfect cake to carry out after a delicious dinner on the patio and serve to your friends and family for the perfect sweet finish. With a strawberry rhubarb jam sandwiched in between layers of  soft cream and vanilla sponge cake topped with tons of berries its the perfect dessert to celebrate summers abundance. Once again the lovely Ella of ellanewmanphotography took these photos and they are just perfect, go check out her sight!

ellanewmanphotography-8.jpg
ellanewmanphotography-7.jpg

Strawberry Rhubarb Jam:

  • 5-6 stalks of rhubarb chopped

  • 1 basket of strawberries

  • Sugar

  • Fresh squeezed orange juice

Throw all your ingredients in a sauce pan with a bit of fresh orange juice and 1/2- 1 cup sugar, or more, depending on the sweetness of your strawberries. Cook over medium high heat until combined and softened. The rhubarb will take a little longer to soften than the strawberries. Overall it will probably be about 10-15 minutes of simmering to get it where you want it. Let it cool completely and refrigerate until ready to use. The jam will keep in the fridge for 3 weeks.

ellanewmanphotography-81.jpg
ellanewmanphotography-67.jpg

Sponge Cake (from the "Decorated" cookbook)

  • 8 oz unsalted butter

  • scant 1/3 cups caster sugar

  • 4 medium eggs lightly beaten

  • 2 1/2 cups all purpose flour

  • 2 1/2 teaspoons baking powder

  • 1/4 teaspoon salt

  • 4 oz whole milk

  • 1 teaspoon vanilla extract

Start by preheating your oven to 335 degrees, then begin to cream the butter and sugar till light and fluffy, about 3-4 minutes. Once it is creamed add the eggs slowly until combined. Sift all your dry ingredients into a clean bowl and then add half of the dry mixture to your butter mixture. Then add the milk and vanilla extract and finish by adding the last of the dry mixture. Mix till just combined. Cook in greased, cake pans until skewer comes out with only a few crumbs. For a normal 9 inch cake pan its about 30 minutes. 

Whipped Cream :

  • 2 cups whipping cream

  • 3 tablespoons powdered sugar or more depending on how sweet you like it.

  • 1 teaspoon vanilla

  • Fresh berries for decorating

Whip the cream until you have soft peaks and then stir in the sugar and vanilla and you're ready to pile it onto the cake.

ellanewmanphotography-75.jpg

To Assemble:

Cut your cake layers in half through the middle, I do this with a bread knife and a careful sawing motion, once they are completely cooled from cooking. Once they have been cut in half layer jam on the bottom half some cream on top and sandwich it with its top half. put cream in-between the two cake layers and then do the same with the jam and cream for the second sandwich. continue this pattern for as many layers as you have. Then top with remaining whip cream, let it flow down the sides and pile in delicious mounds for a relaxed look. Then cover it with berries, shove them wherever they will fit till its ready for a garden party!

ellanewmanphotography-80.jpg
ellanewmanphotography-73.jpg
ellanewmanphotography-59.jpg
In recipes, sweets Tags recipes, dessert, cake, summer
Comment

Vegetable Snacking Board with Basil Dressing

February 20, 2018 Ally Wankier
veggieplatterfinal.jpg

For about the past year my mom has been totally vegan. It has been kinda crazy and definitely changed up our dinner plans. We've started eating a lot more vegetables and the whole family's eating habits have totally changed. This is what a lot of our dinners look like now, lots of fresh simply cooked veggies and a little meat thrown in for those that want it. It's actually a really delicious and fun way to eat. This is a great meal or even just a snack or appetizer. This is so simple it's barely a recipe, but I added some great green goddess basil dressing from the Tartine All Day cookbook, and it really makes it special and extra delicious! I am craving spring and I thought this was a fun way to get in the mood for fresh vegetables and warmer temperatures!

serving.jpg
carrotboard.jpg

Vegetable Board

(For all the veggies you can do as many or as few as you want, this can make enough for a crowd or just for family dinner.)

  • carrots 
  • asparagus 
  • green beans 
  • fingerling potatoes 
  • greek olives 
  • grilled chicken or rotisserie chicken
  • salt

Tartine Green Goddess Dressing

  • 3/4 cup mayonnaise 
  • 3/4 cup sour cream or greek yogurt
  • 3 Tbsp chopped tarragon
  • 1/4 cup chopped flat leaf parsley
  • 2 Tbsp finely chopped chives or scallions 
  • Juice of 1 lemon
  • 2 olive oil or salt packed anchovies, rinsed, finely chopped
  • 1 ripe avocado, halved peeled and cut into quarters 
  • 3 Tbsp chopped carrot tops 
  • 1/4 tsp salt
  • black pepper 
vegtable plate.jpg

There really isn't much to this "recipe" at all. Start with preparing your veggies. I started with the potatoes because I knew they would cook the longest. Start a big pot of water boiling on high heat and add a good handful of salt. Once its boiling, add your fingering potatoes whole, no need to cut them or anything. Let them boil for about 15 minutes until a fork pokes smoothly through their skin. It's during this time I usually quickly whip up the dressing. Just add all the dressing ingredients into a food processor or blender, and blend until smooth. Taste for seasoning and add a little more salt if needed.

Ok! Next, scoop your potatoes out of the water and set aside while you cook the other veggies. I threw in my asparagus and green beans next, and just let them cook till barely tender and bright green, about 3 minutes. To get them out easily I just used tongs and set them aside to cool. You can run them under some cold water if your worried they'll continue cooking.

vegtable plate2.jpg

Lastly, the carrots - I threw them in for about 5 minutes and then removed with the tongs. They should be just right and still have a little bit of a bite to them. While the veggies cool, you can get out your rotisserie chicken, and cut it into pieces. Then arrange it all on a big platter. I cut my fingerling potatoes straight down the middle for easier snacking and then sprinkled the whole platter with sea salt. Lastly, add a few big handfuls of greek olives. Set a big bowl of the dressing/dip (...I could probably eat this plain!) to the side, and dinner / appetizer / picnic lunch, whatever you want it to be... is served! 

vegtables.jpg
veggieplatter.jpg
In recipes, savory Tags vegtables, dinner, spring, fresh, easy, easter
Comment

Chocolate covered Raspberries

February 1, 2018 Ally Wankier
raspberryfinal.jpg

One of my favorite memories is the summer vacations my family would spend in Bear Lake (an amazing crystal blue lake that lays across the boarder of Utah and Idaho). We'd go with my whole extended family to our grandparents condo and spend the days playing in the lake and eating good food. One of the best things about Bear Lake was their amazing raspberries. We couldn't go without getting baskets of raspberries, famous raspberry shakes, and the best chocolate covered raspberries! In my mind a chocolate dipped raspberry is a thousand times better than a chocolate dipped strawberry. You can pop the whole thing in your mouth at once and its juicy and sweet - and you won't be able to stop eating them! So with these happy memories in mind and Valentines Day coming up, I thought this would be the perfect treat to celebrate the holiday, and its so easy. I don't even know if you can call this one a recipe, but all I know is that they're delicious!

raspberry2.jpg
raspberry5.jpg

Alright, so these are so easy to make and can be ready in no time at all. They are perfect for Valentines gifts for family, just pop a few in a cellophane bag with a pretty ribbon and you're done. 

What you need: 

  •  6 oz. chopped Chocolate (semi-sweet or milk).  Bear Lake always had milk, I did these with semi-sweet. I like them both ways!
  •  1 pint Raspberries 
  • Optional: white chocolate for drizzling or sprinkles for decorating. I just like them plain and simple.
raspberry6.jpg

The rest is really easy. 

1. Melt your chocolate. Now this is probably the most technical part, since technically the chocolate needs to be tempered to maintain its pretty sheen. I use a really easy method that hasn't failed me yet. I learned this from Ina Garten, but lets be honest, that is where most all my food knowledge originates from! 

2. Here's what you do. Put 4 of the 6 oz. of chocolate in the microwave and cook it in 30 second intervals until almost melted. It usually just takes me 2 intervals, for a total of 60 seconds. Then, add the last 2 oz. of chopped chocolate into the already melted chocolate and stir till everything is completely melted and combined. This ensures that the chocolate doesn't get too hot and end up drying with that ugly dusty grey color. This microwave method hasn't let me down yet!

3. Now, the raspberries. Wash them and make sure they are completely dry. I like to sometimes get organic raspberries so I don't have to worry about washing them as much, because you want the raspberries nice and dry so the chocolate will stick.

4. Now, for the dipping. I dip with a fork so I can lift the raspberry up and the chocolate can drain off. Then I set them on parchment paper to dry and just keep dipping. They dry really fast and are ready to eat in no time! 

5. Storing. They will keep for a few hours just sitting out, or a couple days in the fridge....(but, I doubt they'll last that long!!)

raspberry3.jpg
raspberryfinal2.jpg
In sweets, recipes Tags holiday, chocolate, valentines, recipes, sweet
Comment

Citrus and Avocado Salad with Poppyseed Dressing

January 24, 2018 Ally Wankier
saladcu.jpg-2.jpg

This salad has been on repeat at our house since Christmas. I've been on a butter lettuce kick and I think that's part of what makes this salad so good. Its just so tender and perfect with the avocado, its like the perfect combinations of textures in your mouth. Even my dad said the other day, "I just really love that butter lettuce". If he noticed then obviously I'm doing something right. This salad is so easy to just throw together but looks pretty enough to bring to any party. The best part, I use store-bought poppyseed dressing. It is so good, and I have found no reason to look any further than the bottle because it doesn't need changing! This is the perfect salad to give you a bright happy little boost through the long drawn out last months of winter. 

grapefruit.jpg.jpg
segments.jpg
grapefruit1.jpg

I'm also slightly obsessed with grapefruit right now. It's so good and so beautiful. It's the only thing that is getting me through this winter. I got a little distracted taking pictures of the salad because the grapefruit was just begging for attention. I can't get over it, but I'll stop now, and go back to the salad. 

This takes no time to throw together. The longest part is probably segmenting the grapefruit which I've tried to show in the picture above. Just peel it with a paring knife and follow the little sections cutting them out as you go. You'll be left with the picture on the far right, with the meat of the fruit cut out and just the membrane remaining. 

salad sv.jpg.jpg

Alright, salad time. Just gather your ingredients and your almost done.

Citrus Avocado Salad

Serves 4-6

  • 1 head butter lettuce and some red lettuce or other mixed greens (I just mix whatever I have on hand into the butter lettuce to give it a little more substance).
  • 1 grapefruit peeled and segmented 
  • 1/4 red onion cut into thin slices and then cut in half 
  • 1 avocado cut into thin slices or small pieces (whatever you prefer) 
  • Optional: You can add some slivered almonds or feta cheese for more substance if you like.
  • Briannas Poppyseed dressing (or whatever dressing you like, I love this with the flavors).

Alright, throw your lettuce in a bowl add the segmented grapefruit. sprinkle your onion over top and add your avocado spread pretty over top. Remember not to add the avocado if you aren't serving it for a while because it will brown. Add some cheese or almonds if you like, I also do pomegranate seeds in winter. Drizzle with a light amount of dressing, just to coat, and toss when you are ready to serve. 

IMG_7734.jpg
IMG_7717.jpg
In savory, recipes Tags salad, side, winter
Comment

Baked Mushroom Mac and Cheese

January 10, 2018 Ally Wankier
Edited Mac and Cheese.jpg

There's nothing like the cold, dark month of January to make you feel uninspired when it comes to making dinner. That's why quick cozy meals like baked pasta are a go to for me. This baked mac and cheese is simple and quick to put together and can be on the table in thirty minutes. It's delicious and creamy and full of sautéed mushrooms and white cheddar cheese so it feels just a little sophisticated. Nothing like cozying up with some comfort food and your favorite show to make the month of January a little easier.

IMG_7622.jpg
IMG_7676.jpg

This is really a very simple recipe with only a few ingredients, but it seems like fancy mac and cheese with the addition of mushrooms and white cheddar cheese. 

Mushroom Mac and Cheese

Serves 6

1 1b elbow macaroni pasta 

salt (for pasta water)

5 oz sliced mushrooms or about half the container

3 tablespoons butter

1/4 teaspoon garlic salt

  • Creamy Cheese Sauce

1 stick butter 

1/2 cup flour 

2 cups whole milk 

1 1/2 teaspoons salt (more if needed)

1 teaspoon pepper (or more depending on taste)

1/4 teaspoon ground nutmeg 

6 oz  grated white cheddar cheese (you can also just use a sharp yellow cheddar if you can't find white.)

1/2 cup shredded parmesan cheese (for making that golden crispy top)

IMG_7661.jpg

To start, get your water boiling with a good sprinkling of salt for the pasta. Once the water has come to a boil add your pasta, stir occasionally and cook until just done, or a little al dente. About 12 minutes. While the pasta is boiling you can start your white sauce. This is just a basic béchamel recipe, which is a classic french sauce that goes back many, many years. You start by making the rue: put your butter in a pan over medium heat and let it melt. Once the butter has melted, add your flour and cook for about two minutes. Stir constantly until you have a homogenous paste. You can then add your 2 cups of milk, stirring with a whisk to avoid lumps. Once the rue is incorporated you can move to a wooden spoon. It will thicken up very quickly within about 3-5 minutes. Just stir frequently so the bottom doesn't burn. You want it to be thick enough to coat the back of a spoon as shown below. Then turn the heat off. Add your salt, pepper and nutmeg off the heat. At this time, its probably time to drain your pasta, so do that and then place it back in the pot.  Now add your grated cheese to the white sauce and stir till it is just melted. This is why you want your cheese already grated, so you can add it while the sauce is still nice and hot. Taste for seasoning and add more salt if needed, I love salt so I usually always add a bit more for good measure! 


IMG_7634.jpg
IMG_7638.jpg

Photo 1: White sauce is done and ready for cheese to be added!!

Photo 2: Cheese has been added, just stir until its melted and no lumps remain!

  • Sautéed Mushrooms 

Half of a box sliced button mushrooms (about 4-5 oz)

3 Tablespoons butter 

1/4 teaspoon garlic salt 

1/2 teaspoon dried parsley (optional)

Pour the cheese sauce over your pasta and let it sit in its pot while you prepare the mushrooms. Slice the mushrooms, if they aren't already sliced. Melt butter in a small sauté pan and add mushrooms. Cook at medium high heat for about 5 minutes or until mushrooms are cooked through. Add your garlic salt and parsley  and then toss the mushrooms straight from their pan into the pasta. Stir to combine. Now you've almost made it. Finally pour the pasta mixture into a 9x13 pan and top with a half cup, (or more) of grated parmesan cheese. Bake at 375 for about 15-20 minutes, or until the top is brown and a bit crispy. Don't let it go too long or it will dry out the pasta underneath the crispy top. That's it, dinner is ready, try not to eat it all in one sitting!

IMG_7660.jpg


In recipes, savory Tags main dish, winter, comfort food, recipes
Comment

Building A Cheeseboard

December 29, 2017 Ally Wankier
IMG_7580.jpg

Around the holidays we are always making cheese boards at our house. They require almost no prep or cooking, and they are so yummy. I could just snack on a cheese board for dinner and be happy. Today I thought I'd give you all some tips on how I like to put together my cheeseboards. Last year I posted a picture of a cheeseboard I made on Instagram and it was by far my most liked photo of the whole year. So, I figured why not do a blog post dedicated to cheese. Is there a more perfect way to end the year than with a board of cheese? I don't think so.

IMG_7595.jpg
IMG_7575.jpg

So, to start there are a few general rules of thumb that will always keep you on the right track. 

First, the cheese. You want a good assortment of different types of cheese, but not too many options. I usually go for the rule of 3. One soft mild cheese, One hard cheese, and then a blue cheese or goat cheese. 

Soft Cheese Options: Brie or Camembert are what I almost always choose for my soft cheese.They are well liked and almost always a hit with everyone.

Hard Cheese Options: White Cheddar, Pecorino Ramono, or Parmesan. All are good, but I usually go with a sharp white cheddar because it's one of my favorite flavors ever.

Blue Cheese or Goat Cheese: For this last cheese, I usually just pick what looks good or exciting - for me, this third cheese is the time to try something new. If you want something classic you can always go for a good Roquefort or Stilton blue cheese.

IMG_7584.jpg

After I pick the cheese its time for the jams and jellies!! I always have at least 1 type of jam with a pot of honey, or maybe two jams if I feel like it. Almost always I like to have a sweet pepper jelly because those are my favorite to eat. Trader Joes has a great pepper jelly and you can find pretty decent ones at most grocery stores. Below I list a few of my other favorite options.

Basil Pesto (great for a summer cheese board with fruit and fresh mozzarella)

Fig Jam 

Orange marmalade 

Olive Spread or Tapenade 

Quince Paste or Jelly (really good with hard cheese and crusty bread)

Sour Cherry Jam (yummy with pungent soft cheeses, to give it a nice sweetness)

Really, the options are endless, just try to find something with different notes of flavor that will enhance the taste of your cheese.

IMG_7604.jpg

So now we have our main players. The real stars of the cheeseboard are there. It's time to add the extras that put it over the top. First, make sure you have a good cracker. I love just classic, crisp water crackers or crackers studded with nuts and dried fruit. I also like to slice up a baguette so there are plenty of options. Then I cut up some fresh fruit, thin slices of apple and/or pear are really good with the savory cheese. You can also do something like dried apricots or fresh citrus which are always very good. I'll sometimes add a little bowl of pickles or nuts and finally, just a bit of meat. Good salami or prosciutto is always perfect and adds just the right salty bite.  

Well, I think that's about it! Those are all my tips for a successful cheeseboard, I love that you can always mix it up and it will still taste good. So have fun and be creative! This is the perfect New Years show stopper.

In recipes, Parties Tags cheese, cheeseboard, side, holiday
Comment

Ina Garten's Coconut Cake Dressed for Christmas

December 13, 2017 Ally Wankier
IMG_7550.jpg

When it comes to recipes, Ina Garten is a wizard. I have never made anything of hers that wasn't a hit. You can tell she's tested every recipe over and over and everything is always delicious. This coconut cake is a favorite in my family that we make for everything. I decided this year to decorate it up for Christmas with a few bottle brush trees and some easy to make marzipan mushrooms. It was begging for Christmas decoration since it was already covered in coconut snow. So whatever Christmas party you're having, make this cake, it is always a hit. 

IMG_7542.jpg
IMG_7499.jpg

Ina's Coconut Cake

3 sticks unsalted butter at room temperature, plus more for greasing the pan

2 cups sugar

5 extra large eggs at room temperature

1 1/2 teaspoons vanilla extract

1 1/2 teaspoons almond extract

3 cups all purpose flour, plus more for dusting the pans

1 teaspoon baking powder

1/2 teaspoon baking soda

1/2 teaspoon kosher salt 

1 cup milk

4 ounces sweetened shredded coconut

IMG_7520.jpg

Frosting

1 pound cream cheese at room temperature

1/2 pound (2 sticks) unsalted butter at room temperature 

3/4 teaspoon vanilla extract 

1/4 teaspoon almond extract

1 lb confectioners sugar sifted

6 ounces sweetened shredded coconut

IMG_7516.jpg
IMG_7524.jpg

Preheat your oven to 350 degrees and grease two round cake pans. I like to also line them with parchment paper so they're super easy to get out. In a mixing bowl, or the bowl of your electric mixer, cream the butter and sugar until they're nice and fluffy and pale yellow. Ina always uses lots of butter and we love her for it. Then add the eggs one at a time and scrape down the bowl between each addition.  Finally, add both the vanilla and almond extract. In a separate bowl sift your dry ingredients and with the mixer on low speed alternate adding your dry ingredients with the cup of milk. Do this in three parts, starting and ending with dry ingredients. Once it is incorporated fold in your 4 ounces of coconut and pour evenly into your two pans. Bake for 45-55 minutes (mine usually is ready at about 40) or until golden brown and a toothpick comes out clean. For the frosting, in your mixing bowl add the softened butter and cream cheese and mix until creamy. Add vanilla and almond extract. Once it's smooth, add the powdered sugar on low speed until smooth and don't whip. Then you are ready to assemble. Place one of your cakes on a cake stand and spread with frosting, top with the second layer and cover completely. Then using the 6 ounces of coconut press it into the sides and top for a snowy effect. Serve at room temperature and thank Ina for another delicious cake! 

IMG_7529.jpg

Now I know you want to learn how to make these cute little guys. These are a staple of mine that I've been making for years to top all sorts of cakes and they're delicious. If you are an almond fan, you will love these little marzipan mushrooms!

Marzipan Mushrooms

4 ounces (more or less) marzipan (find this on the baking isle of most grocery stores)

1 tiny drop red food coloring 

Making these is pretty simple. I take about 4 ounces of marzipan and split it in half. I then use a toothpick to carefully add red to one half of the marzipan and I use my fingers to work it in. Once you have your red it's really just free forming the little mushrooms. I usually start with the little stumps, and then add the caps, and finally the small white spots. I make some smaller and some larger so I have a good variety.  Merry Christmas!

IMG_7488.jpg
IMG_7502.jpg
In recipes, sweets Tags dessert, holiday, cake
Comment

Bridal Tea

August 9, 2017 Ally Wankier
ellanewmanphotography-5374.jpg
ellanewmanphotography-5381.jpg

I was able to throw a wonderful bridal tea, for a cute friend of mine and it was so fun to pull out all of the tea cups and vintage dishes I've collected over the years. I had wonderful ellanewmanphotography take these pretty pictures because she is just the very best! I thought I'd  post these pretty pictures on the blog and give you all a few tips and tricks for throwing a tea party as well as some of my favorite recipes.

ellanewmanphotography-5395.jpg
ellanewmanphotography-5383.jpg

The Menu 

For the menu I wanted to do something special. I wanted it to feel like a real tea straight from London, and so besides the fact that it was 90 degrees and we didn't have actual tea. I tried to get the food spot on! 

  • Cream scones with butter and jam and lemon curd
  • Curry chicken salad sandwiches 
  • Cucumber tea sandwiches 
  • Roast beef horseradish sandwiches with watercress 
  • Mini caprese kabobs
  • Chocolate "petite fours" 
  • Mini mille fuille with raspberries and lemon
ellanewmanphotography-5412.jpg
ellanewmanphotography-5405.jpg
ellanewmanphotography-5411.jpg

A few of my favorite recipes from the day were definitely the scones, the baby mille fuilles and the curry chicken sandwich!! 

For the Scones: This is a great recipe I got from a cute friend who is from England, these are the scones she grew up making with her dad. I've doubled the recipe because it makes a very small amount.

  • 2 cups flour 
  • 4 teaspoons baking powder 
  • 4 oz cold butter cut into cubes 
  • 2 large eggs
  • 3/4 cup milk 
  • pinch of salt 

In a stand mixer combine the flour, baking powder and salt add the butter and mix until it is like coarse sand, with pieces of butter still visible. In a separate bowl mix the eggs and milk together before adding them to the flour mixture. Mix until just combined, it should be a fairly wet dough. Try to handle as little as possible, turn it out onto a floured surface and pat out to about 1/2 inch thick you can cut them into triangles with a knife or use a round cutter like I did. Place them on a baking sheet and brush with milk. Bake at 425 degrees for 10 minutes or until they have risen and are just turning golden. 


For the chicken curry sandwich I used Ina Gartens recipe it is so delicious you can find it here. I then simply put the chicken salad onto a good white bread and cut into little soldiers. I got about four tea sandwiches out of one normal sandwich.

ellanewmanphotography-5390.jpg
ellanewmanphotography-5410.jpg

The Mille Feuille was super easy but looks very impressive and is so fun to serve to your friends. Here is what you will need:

  • store bought puff pastry 
  • store bought lemon curd 
  • raspberries
  • softly sweetened whipped cream 
  • powdered sugar 

To start thaw your pastry in the fridge overnight. Roll out one of the 2 pieces and cut into even squares, I tried to get about 12 so 3 across and 4 down but its alright if they aren't perfect. Place them on a baking sheet lined with parchment. Then put another piece of parchment on top and another sheet pan to keep them nice and flat. Bake in a 350 degree oven for about 15 minutes but watch them because they can go brown quickly without you even seeing. Do the same with the next piece of dough so that in total you will have 24 pieces for 12 mille feuille. Once the pastry is cool you can assemble. Spread lemon curd on the bottom 12 pieces along with a small amount of whipped cream and then top with 2 raspberries. Spread whipped cream on remaining 12 top pieces and then place them on top of the raspberry pieces. Place onto your tray and dust with powdered sugar. 

ellanewmanphotography-5412.jpg
ellanewmanphotography-5417.jpg

The Table

When I was planning the table I wanted to start with a neutral base and then just build off of that. I used liberty of london paper products which are always so darling and appropriate for a garden tea. Then I used vintage plates and goblets I have collected with my mom over the years from second hand shops. That was about it, I used mismatched tea plates and saucers to hold jam and butter and the table was ready for a party. 

ellanewmanphotography-5376.jpg
ellanewmanphotography-5420.jpg

This was such a fun party to host and a great excuse to use all my vintage wares. Happy Wedding Lillian!!

In Parties, recipes, savory Tags summer, garden, party, recipes, main dish
Comment

Strawberry Shortcake

May 10, 2017 Ally Wankier
IMG_7483.jpg
IMG_7338.jpg

Spring is the most exciting time of year. Everything comes back to life and it's finally strawberry season. A ripe strawberry is so delicious and perfectly sweet you don't need to do one thing to it. So what a better way to enjoy that strawberry than sandwiched between a biscuit with loads of whip cream? This is the perfect dessert to serve for mothers day. It's festive and fun, but super easy, and the fresh fruit does all the talking. 

Shortcake Biscuits

makes 8 round biscuits

2 1/2 cups flour

2 teaspoons baking powder

1 teaspoon salt

1 stick cold butter cubed 

1 lightly beaten egg

1/2 cup cold heavy cream ( plus an extra tablespoon or so if dough seems dry)

raw turbinado sugar for sprinkling

4 cups of sliced strawberries 

4 tablespoons sugar ( helps them to macerate and create a good sauce)

To start, slice your strawberries and mix them with the 4 tablespoons sugar. Set them aside and give them time to sit in their own juices while you make the biscuits. To make the biscuits put the flour, baking powder, and salt in a mixer and combine. Add your cold cubed butter a few pieces at a time with the mixer on low, (you could also cut the butter in by hand with a pastry cutter). Mix until it looks a little like sand and the butter is the size of peas. Add your beaten egg and cream and mix until just combined. It should be a little on the dry side, but still come together, if not add a couple tablespoons cream. Pat the dough out on a lightly floured surface keeping it a fairly good thickness and cut your biscuits out with a round cutter or a drinking glass. Be sure not to turn your cutter back and forth as you cut or it will prevent them from rising as high.

IMG_7371.jpg
IMG_7378.jpg

You should get 8 biscuits out of your dough. You will probably need to roll it out twice for the right thickness for about 4 biscuits per time. Try to do it quickly so you don't handle your dough too much and melt the butter. Place on an ungrease cookie sheet and top each one liberally with turbinado sugar. If you want to ensure more of a shine you could also brush each biscuit with a beaten egg. Place them in a 400 degree oven for 20-25 minutes. When they come out transfer them to a cooling rack while you whip the cream. 

IMG_7401.jpg
IMG_7405.jpg

Vanilla Whipping Cream 

1 1/2 cups whipped cream 

1/4 cup powdered sugar 

1 teaspoon vanilla 


Whip the cold cream until soft peaks form.Stir in the powdered sugar and vanilla and serve immediately on-top of the strawberries and biscuits.

Building the shortcakes

1. Cut each biscuit in half with a sharp serrated knife.

2. put a small bit of cream on the bottom half of each biscuit

3. pile about a half cup of strawberries on each shortcake

4. Top with more cream!!

5. Place the top half of the biscuit on the layer of cream and serve.

IMG_7412.jpg
IMG_7475.jpg
In sweets, recipes Tags dessert, mothers day, holiday, recipes
Comment

Spring Celebration

April 24, 2017 Ally Wankier

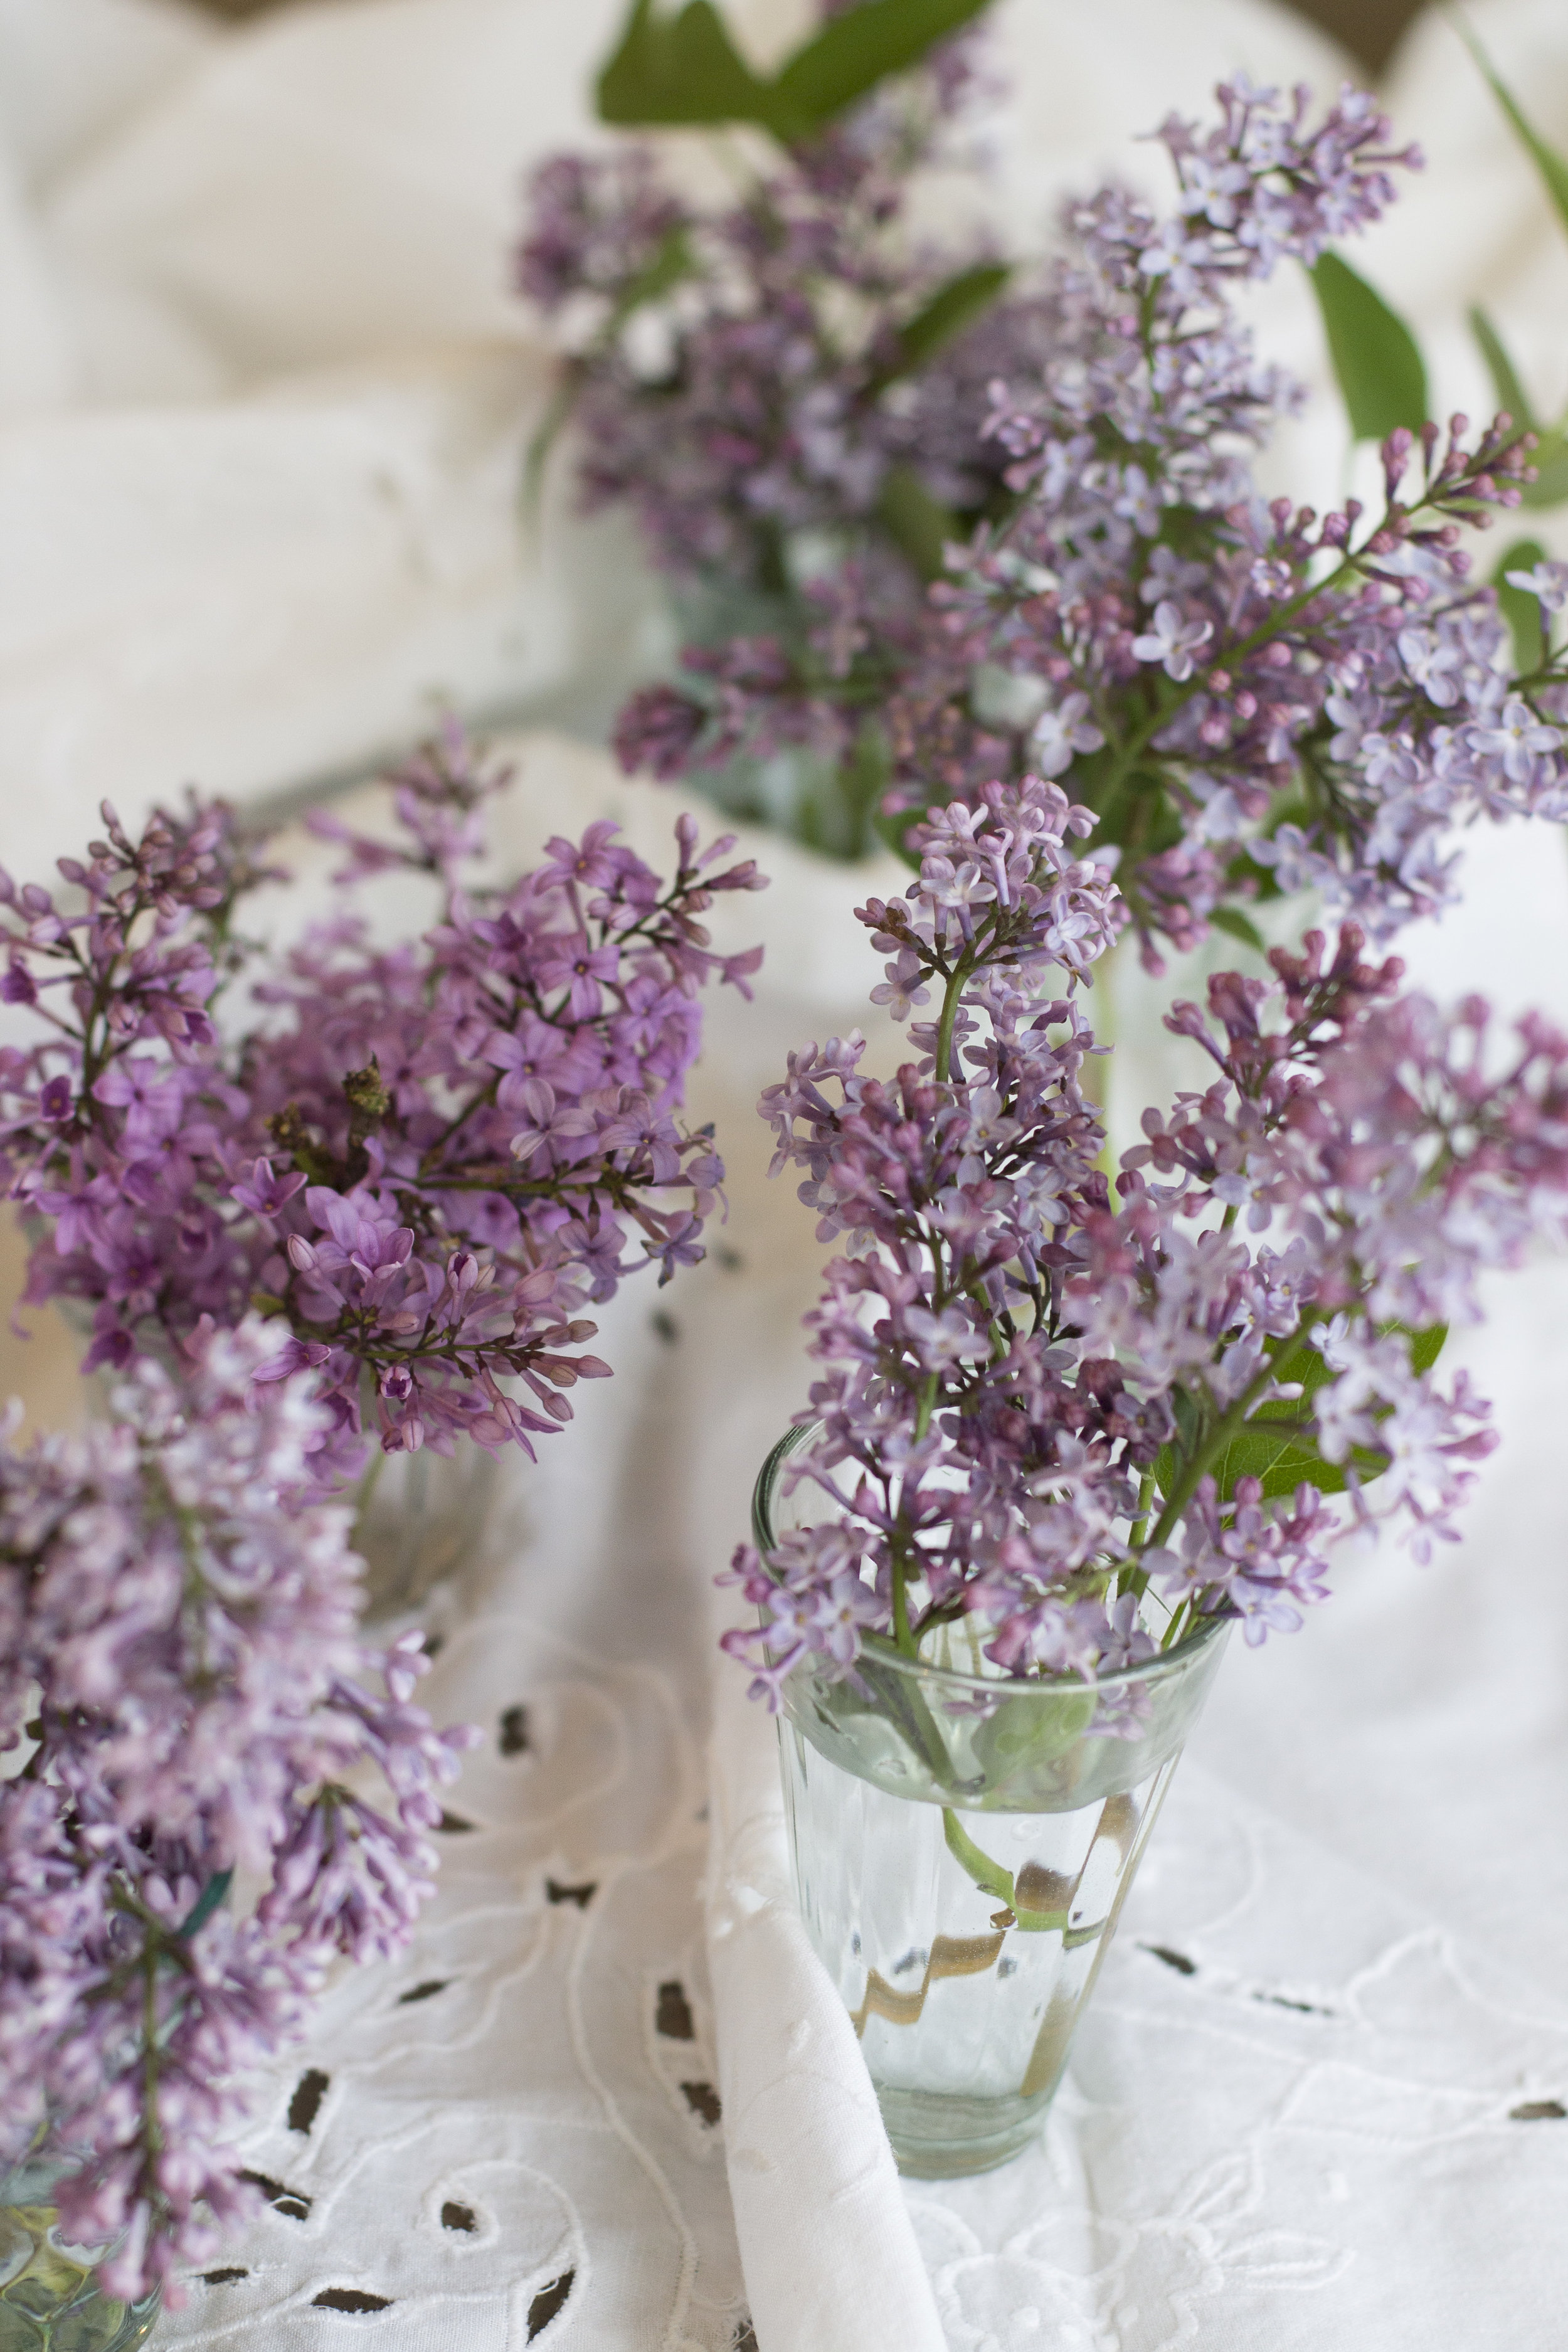
There is no better time in the year than spring. The earth comes alive after a long winter and the beauty of everything just seems amplified. I spent another lovely day with Ella Newman and her wonderful photography skills and once agin it was so much fun. I made some delicious new recipes and as usual she took some amazing pictures. I always am excited for any change of season because it means new produce, and different vegetables and fruits to work with. Spring has some of the best: asparagus, strawberries, rhubarb the list goes on and on. It gets me excited just thinking about it. So to celebrate the coming of spring I made roasted chicken thighs with a fresh basil and scallion sauce, the bright green color alone is enough to get excited about! I also made some orange rolls because whats better than a springy orange roll for Sunday dinner in the backyard. Ella brought some beautiful lilacs and they just made the whole table, nothing makes me think of spring like those wonderful smelling blossoms!! 

Ellanewmanphotography
ellanewmanphotography-4640.jpg

Roasted Chicken Thighs with Basil Scallion Sauce 

6 chicken thighs (with the bone in and skin on)

2 tablespoons olive oil

salt and pepper 

Sauce

1/2 cup chopped fresh basil 

4 scallions sliced thinly

1 clove garlic minced 

1 teaspoon sea salt 

1/3 cup olive oil 

ellanewmanphotography-4519.jpg
ellanewmanphotography-4531.jpg


To start preheat your oven to 375 degrees. Place your chicken thighs on a sheet tray and drizzle each with just a bit of olive oil (about 2 tablespoons). Sprinkle with salt and pepper and a bit of chopped basil and put in the oven to bake for 20-30 minutes depending on how big the thighs are. You'll know they're done when the juices run clear and the skin starts to get a bit of color on it. Meanwhile while they cook prepare the sauce. Chop up your basil and scallions and throw them in a bowl with the minced clove of garlic and a good amount of salt. Add the olive oil and stir, let it sit while the chicken is baking so the flavors had time to combine and marinate.

Finally, remove your chicken from the oven, let it rest for about 10 minutes so the juices can redistribute. Place it on a serving platter with extra basil and serve with the sauce spooned over top.

ellanewmanphotography-4510.jpg
ellanewmanphotography-4636.jpg
ellanewmanphotography-4522.jpg

Spring Orange Rolls

dough recipe adapted slightly from http://www.epicurious.com

1 envelop active dry yeast 

2 tablespoons sugar 

1 egg yolk slightly beaten 

1/3 cup fresh orange juice 

2 tablespoons melted butter 

1/2 teaspoon salt 

1 1/3 cup flour 

non-stick spray 

Filling

1 stick butter 

zest of 2 oranges 

1/2 cup sugar

Glaze

1/2 cup powdered sugar

1-2 tablespoons fresh squeezed orange juice 

ellanewmanphotography-4553.jpg
ellanewmanphotography-4587.jpg

To start place the yeast and 3 tablespoons warm water in a bowl with 1 tablespoon sugar. Stir to combine and let sit for 10 minutes or until foamy. In an electric mixer beat the egg yolk, orange juice, melted butter, salt and remaining tablespoon of sugar. Add your 1 3/4 cup flour and yeast and mix until dough just comes together. Turn your dough onto a floured surface and knead until smooth (about 5 minutes). Dough will be fairly sticky. spray a bowl with non-stick spray and place your dough in the bowl, cover with a towel and let rise in a warm place for about 45 minutes or until doubled in size.  While waiting mix your filling together cream the softened butter with the sugar and orange zest and set aside.

ellanewmanphotography-4599.jpg
ellanewmanphotography-4566.jpg

Once the dough is doubled in size spray a 9x13 pan or a muffin tin with non-stick spray. Turn your dough out onto a floured surface and shape into a 12x14" rectangle. Spread the filling across the dough leaving a small boarder around the edge. Roll the dough over itself starting with the edge of one of the 14" sides, until you have a long rolled log. Slice the roll into 12 pieces, the dough will be very soft so if you have trouble you can place it in the fridge for 20 minutes to make it easier to cut. place the rolls in their pan or muffin tin and let rise for another 30 minutes.

Lastly, preheat your oven to 350 degrees and bake for about 18 minutes or until lightly browned. Let them cool for about 10 minutes and make your glaze. Combine your powdered sugar and orange juice until smooth and creamy, then drizzle over the top of the rolls. Serve warm. 

ellanewmanphotography-4596.jpg
ellanewmanphotography-4571.jpg
ellanewmanphotography-4627.jpg

There you have it, a delicious spring meal you can whip up any time. Just add a green salad and dinner's ready! Happy spring!

In recipes, Parties, savory Tags party, spring, main dish, basil, chicken
Comment

Almond Raspberry Baby Cake

March 9, 2017 Ally Wankier

Well it is finally March, which calls for a celebration! Spring is on it's way! I have been super behind putting this cake recipe up with more of Ella Newman's darling photo's, but i'm finally getting around to it! This cake is so delicious there is nothing better than the combination of raspberries and almond, it's a match made in heaven. For the base of this cake I used a great recipe from livforcake.com and it is oh so good, she knew what she was doing with this one. I just added some almond flavor and more raspberry and put my own little spin on it. It's hard to find a good white cake recipe and I think this is just that! 

ellanewmanphotography-3711.jpg
ellanewmanphotography-3716.jpg

White Cake from livforcake

1 1/2 cups cake flour sifted

2 teaspoons baking powder 

1/4 teaspoon salt

3 oz. room temperature butter 

3/4 cups granulated sugar 

1 large egg 

1/2 cup milk 

1 teaspoon vanilla (I add a tsp of almond extract as well)

Preheat oven to 350 degrees. Whisk all dry ingredients together in a small bowl and set aside. Cream butter, and sugar on medium high speed until pale and fluffy, about 3 minutes. Add egg and vanilla, and almond if using, and mix until combined. Alternate adding flour mixture and milk to butter mixture, beginning and ending with flour. Divide batter evenly amongst your pans and bake for 25-30 minutes. You don't want to overcook because the cake dries out quickly so watch them closely. She baked them in three 4"x3" cake pans, I baked it in two pans one slightly bigger than 4"x3" and one slightly smaller, so it evened out. Just remember when you're thinking what pans you want to use this recipe doesn't make enough for 2 standard round pans.

Raspberry Buttercream

1 stick softened butter

2 cups powdered sugar (may need a little more or less)

2-4 tablespoons milk 

3 tablespoons raspberry jam 

1 teaspoon almond flavoring 

red food coloring (optional)

To make your butter cream whip the softened butter in a stand mixer at medium speed. Slowly begin to add 1 cup of the powdered sugar until it is well combined, it will seem really thick. Add a couple tablespoons of milk and mix again, then add the last cup of powdered sugar. After mixing the sugar in you may need another tablespoon of milk. You want it to be thick but spreadable. Lastly, stir in the almond extract and raspberry jam. You can leave it as is, it will be a muted purple color, or you can add a drop of red food coloring to give it a more pink hue, which is what I did.

ellanewmanphotography-3711.jpg
ellanewmanphotography-3726.jpg

*** Here are my tips to go about frosting the cake, these steps will insure your cake looks flawless!

1. I put the cake in the freezer wrapped in plastic wrap for about an hour so it was nice and cold and didn't crumble when I cut or frost it.

2. I then sliced the 2 layers in half so I had a total of 4 layers. Slather raspberry jam in-between the layers before you stack the cake and frost it.

3. I started with a crumb coat, or in other words just a thin layer of frosting that holds all the crumbs in. After you apply this thin layer pop it in the fridge for 30 minutes to an hour so it can harden up.

4. Pull it out of the fridge and top with your final frosting layer, it can be a little on the thicker side so you don't scrape into the crumb coating. Finally top with raspberries and you're ready to celebrate!

In sweets, recipes Tags dessert, cake, spring, fruit, sweet
1 Comment

Valentines Brunch

February 13, 2017 Ally Wankier
ellanewmanphotography-3791.jpg
ellanewmanphotography-3825.jpg

Well, Valentines is tomorrow but that doesn't mean you can't have a pretty little brunch any day of the year. I had the most fun day with Ella Newman - she takes the prettiest pictures, which you can see more of here. We got together for a quick Valentine's shoot and ate chocolate waffles and citrus salad, and chatted about life - and it really was the best time. I am so happy because now I have these beautiful pictures to post all thanks to her skills behind the camera. I've always loved Valentines day, I think it's such a bright happy holiday in the middle of bleak winter. I really can't think of anything better than celebrating it with pretty dishes and sweet treats. So go grab the people you love and make them some chocolate waffles, because who wouldn't want those?

For this little brunch I did a simple, super sweet menu. There were plenty of chocolate waffles, a yummy citrus salad, and some sparkling pink lemonade. If you wanted to add some real food in there, or add a little protein, a frittata or some scrambled eggs would be great! I used some pretty vintage pink glasses and these darling oval plates with gold rimming, both finds from a second hand store. Because, let's be honest, is it even a party without pretty dishes? 

Chocolate Waffles

- 1 stick butter

- 5 tablespoons cocoa

- 4 eggs

-1 1/2 cups sugar

-2 cups flour

-pinch of salt

-1 teaspoon vanilla

To start, melt your butter and mix in cocoa until combined. Next, whisk each egg into the chocolate mixture and then add the sugar. Finally, add the flour and salt until just combined, then add the vanilla. Heat your waffle iron to high and spray with non stick spray. Put a tablespoon (or up to 3) of batter in the iron,  depending on the size of your waffle maker. Cook depending on waffle maker directions and eat warm with soft whipped cream and chocolate sauce!  

ellanewmanphotography-3739.jpg
ellanewmanphotography-3749.jpg
ellanewmanphotography-3756.jpg

Ok, now we have the citrus salad. I think this was my favorite part of the day. You forget how good fresh citrus is and how pretty it is. I just can't get over those colors! This isn't even a recipe - all you need is some sea salt, citrus, and olive oil and you're good to go!

Citrus Salad

- 1-2 grapefruits, peeled and sliced

-1-2 oranges, peeled and sliced

-1-2 blood oranges, peeled and sliced

- sprinkle of Maldon sea salt

- 2-3 tablespoons of olive oil

Alright, so all you do is slice the citrus, drizzle the oil, sprinkle some sea salt and eat. Yum!

This was such a fun day - go look at Ella's beautiful website to see more photos of this pretty day, then make these recipes - you will not regret it!  Happy Valentines Day! 

ellanewmanphotography-3766.jpg
ellanewmanphotography-3787.jpg
ellanewmanphotography-3780.jpg
In recipes, Parties, breakfast Tags breakfast, waffle, recipes
Comment

White Cheddar and Pear Salad with Mustard Vinaigrette

January 13, 2017 Ally Wankier

Here we are in January again. I always have the hardest time with this month, it's dark and cold and the memories of Christmas still linger in the air but all the magic is gone. But... it's not all bad - January is a time for new beginnings, and it's a time for fresh foods to wash down all the Holiday cookies. This salad will do just that, it will cleanse your pallet of the Christmas goodies and start you off on a healthy but delicious note. My mom is a January birthday so she has always loved January, and this is one of her favorite salads...so it could even be a birthday salad. (I guess no one probably wants a birthday salad, but she might...!) I can see why she loves this one though, with sweet pears and mustardy dressing covered in sharp cheddar cheese - this isn't just any old salad! So on one of these dark, January days, go make this for yourself and maybe you'll feel like celebrating this gloomy, but hopeful first month of the year.

IMG_7240.jpg
IMG_7247.jpg

First, I have to take a moment to honor this BEAUTIFUL butter lettuce, because this salad would not be near as delicious without it's soft, mellow, buttery leaves. A beautiful head of butter lettuce will make me happy no matter how gloomy the day is!

WHITE CHEDDAR AND PEAR SALAD:

-Serves 4-6-

1 head of butter lettuce, torn into bite size pieces 

1 -2 bartlette pears

1/2 cup roughly chopped pecans

1/2 cup or more grated or shaved sharp white cheddar cheese

MUSTARD DRESSING:

1 heaping tablespoon course dijon mustard

3 tablespoons apple cider vinegar

1/3 - 1/2 cup mild tasting olive oil

1/2 teaspoon salt

1/4 teaspoon pepper

Ok, now to assemble the salad, tear the head of lettuce into a bowl and top with thin slices of pear. I usually only use about 1 pear, but if you want more, go ahead and do two. Sprinkle the chopped pecans over the top and then grate the cheese. Don't be shy with the cheese - it gives the salad such a good, salty bite.

Now, to make the dressing - in a small bowl add the mustard and vinegar. Whisk them together until combined, and then continue whisking as you begin to add the olive oil. Let the steady stream of olive oil continue as you whisk until the dressing is slightly thickened.  This will take 1/3 to 1/2 a cup of oil. Don't use too much olive oil, or that'll be all you can taste. Lastly, add your salt and pepper and pour over the salad. Toss gently then serve immediately. This is great to serve alongside pork or chicken, or really any dish you like.

In savory, recipes Tags salad, side, lettuce
Comment

Chocolate Mendiants

December 15, 2016 Ally Wankier

I have wanted to make these little chocolate treats for years and just have never gotten around to it. So, finally this year when I saw them in Bon Appetite Magazine I decided I was going to do it. They were so simple and fast I wondered why I'd never made them before. These little traditional French treats are simply melted chocolate shaped into a small circle and topped with fruit, nuts, candied citrus and pretty much anything you can think of. I think of them as your own individual chocolate bark, each bite can be tailored to have exactly what you like on top. I had to do some with peppermint on top because I love the festive look and peppermint bark is always a holiday staple. But, I have to say the traditional fruit and nut combination is pretty perfect. The salty and sweet with the rich chocolate, it's the perfect bite for after a large holiday dinner. I also felt like I had to make these, because what perfect neighbor gifts! They are beyond simple to make and look super pretty/ fancy in a little paper bag tied up with festive string. I think there is nothing better than a homemade treat. So if you're in a pinch this holiday or need something delicious in a hurry these little guys are just for you!

IMG_7018.jpg
IMG_7050.jpg

Chocolate Mendiants

-makes 30-35 candies-

8 oz. good chocolate (I use ghiridelli 60% or 70% baking bars)

chopped pistachios

pecan halfs

dried cranberries

sunflower seeds

cashews

rasins

crushed candy canes, dried fruit, nuts, candied ginger, sea salt, anything you want!

Melt your chocolate in a double boiler or in the microwave in 30 second increments till almost melted. Then stir chocolate till smooth and the heat of the melted chocolate has melted all remaining chocolate pieces. Lay a sheet of wax paper across a cookie sheet. Spoon dollops of chocolate onto the wax paper and spread into a circle just larger than a quarter. Continue till you've filled the sheet and then sprinkle each with toppings of your choice. I recommend leaving the peppermint alone, it's best by itself. Mixing the nuts and fruits is really delicious! After they all have their topping pop them in the fridge to harden for at least an hour, but they can be kept for 4 days in the fridge before serving. Peel off the wax paper and enjoy with a warm drink! 

Happy Holidays!! 

XOXO

In sweets, recipes Tags recipes, holiday, chocolate, christmas, candy
Comment

Walnut Pear Sour Cream Torte

November 20, 2016 Ally Wankier

This recipe is one of my moms very favorites, she tore it out of a magazine years ago and it has been a classic ever since. It's so delicious and not too sweet, it comes together quickly but it looks so impressive. This recipe takes a few steps but once you've made all the pieces it is easy to assemble, and always bakes up perfectly. With Thanksgiving just days away I think this is the perfect cake to add to your mix of classic pies! I am all about too much of everything on Thanksgiving, so besides your classic pumpkin, apple, and pecan pies add in a pear torte for absolute gluttony. Happy Thanksgiving!

Walnut Pear Sour Cream Torte

1 cup chopped walnuts

1/3 cup packed brown sugar 

1 tsp ground cinnamon 

1/4 cup butter 

1/3 cup ap flour 

2 medium pears, sliced and peeled (about 2 cups)

2 tsp lemon juice 

1 3/4 cup ap flour

3/4 tsp baking powder 

1/2 tsp baking soda 

1/4 tsp salt 

1/2 cup butter soften 

1 cup sugar 

1 tsp vanilla 

2 eggs 

1 cup sour cream 

IMG_6823.jpg
IMG_6826.jpg

To start, preheat oven to 350 degrees. Grease a 9 inch spring form pan. Combine the 1 cup nuts, brown sugar and cinnamon in a small bowl. For topping cut the 1/4 cup butter into the 1/3 cup flour to make course crumbs and stir in 3/4 of the nut and sugar mixture. Set the topping aside. Slice your pears and toss with lemon juice and set aside. In a medium bowl combine the 1 3/4 cups flour, baking powder and baking soda and salt and set aside. In a large bowl beat 1/2 cup butter and sugar until light and fluffy, add in the eggs one at a time and the vanilla. Next, add the flour mixture to the butter mixture alternating with the sour cream beat after each addition until just combined. Spread 2/3 of the batter into the pan and then sprinkle the 1/4 remaining sugar and nut mixture over the batter. Layer the pears over top and then gently spread the remaining 1/3 of batter over the pears. Sprinkle the crumble topping over the batter and bake for 45-55 minutes or until a toothpick comes out clean. Let cool for 10 minutes before removing from its pan and serve warm or cool with whipped cream. 

IMG_6736.jpg
IMG_6899.jpg
In recipes, sweets Tags dessert, holiday, recipes, thanksgiving
1 Comment
Older Posts →

Hi, I'm Ally, author of Fig and Berrie. Thanks for visiting! 

Learn More
“People who love to eat are always the best people.”
— Julia Child

Follow on Instagram @figandberriekitchen

A bit of summer on this cold December day. I finally, about 6 months late, got this cake on the blog.🙈 So... merry Christmas, enjoy this sunny scene! ☀️🎄 .
.
.
.
.
. #figandberrie #cake #bonappetitmag #f52grams #christmasbaking #foodblog #foodblogf
Happy 4th of July!🇺🇸 here’s a pretty picture of a garden cake to celebrate! 📷: @ellanewmanphoto
.
.
.
.
.
.
. #foodandwine #food52 #bonappetit #foodblog #foodblogfeed #feedfeed #figandberriekitchen #figandberriesummer #fourthofjuly #summerfo
When my grandpa was a little boy his mom made these cookies for him. They have always been my grandpas favorite and my grandma has made them for him all through their marriage. My mom now makes them for my dad and our family, and we think they are pr
A delicious simple dinner/appetizer/snacking board is on the blog with an amazing green goddess dressing from the Tartine All Day cookbook! Link in profile✨
.
.
.
.
.
.
. #figandberriekitchen #foodblogger #foodblogfeed #eatmoremagic #f52grams #bonapp
I’m ready for spring! So a new recipe for a simple, healthy, springtime dinner is coming to the blog soon!
.
.
.
.
.
.
.
. #figandberriekitchen #foodblogger #food52 #f52herbs #foodblogfeed #bonappetit #feedfeed #foodphotography #foodie #foodand
Valentines is almost here💘 I’ve been looking back at this pretty shoot I did with @ellanewmanphoto and remembering these delicious 🍫waffles!! They are so easy and the perfect valentines treat. Link in profile✨❤️
.
.
.
.
.
.
. #figandberrie #f
I swear this is the last picture of raspberries! But these guys are officially up on the blog and the perfect Valentines treat.❤️💕❤️
.
.
.
.
.
. #food52 #foodblogger #buzzfeedfood #foodblog #feedfeed @thefeedfeed #foodblogfeed #bhgfood #countrylivin
It’s finally February! I thought we’d never make it. January felt like the longest month, so here’s a picture of berries to celebrate✨
.
.
.
.
.
.
. #food52 #foodblogger #foodphotography #foody #feedfeed #buzzfeedfood #marthastewart
One of my favorite memories is going to Bear Lake every summer and eating lots of chocolate covered raspberries! It was the best treat and something I never had anywhere else. So I decided to try and recreate them at home, and I can’t stop eati
This salad has been on repeat in our house since Christmas! It’s the perfect combination of flavors, and is now up on the blog! Link in profile✨🥑🍊
.
.
.
.
.
.#foodblogger #buzzfeedfood #food52 #foodie #foodphotography #foodandwine #feedfeed #

FEATURED RECIPES

Popovers
Popovers
Mint Slush
Mint Slush
Christmas Cake
Christmas Cake
Party Cheeseboard
Party Cheeseboard
You must select a collection to display.

Powered by Squarespace                            

Privacy Policy